Tuesday, February 28, 2012

First time making arancini


So I've never made arancini (pronounced like the name Aaron and then Chiny). Arancini are rice balls stuffed with cheese and fried. I had spinach artichoke and mushroom risotto leftover and decided to make this. I stuffed the arancini with goat cheese. I also made a grilled romaine salad to go on the side. Details below...

Leftover Risotto Arancini (with grilled romaine salad)
serves 3-4

2 cups leftover risotto
1 egg
enough breadcrumbs to thicken (I made fresh breadcrumbs and used about 1 cup)
-my risotto was very wet and I had to add about 4 tablespoons of flour to dry it up enough
 2 ounces of goat cheese (or other cheese, if using hard cheese cube it)
Oil for frying (about an inch in the pan)
 1 more egg for egg wash
flour to roll arancini 
more breadcrumbs to roll arancini in

2 heads of romaine plus whatever else you like in your salad 
Vinaigrette dressing

First heat your oil in a fry pan over medium heat. Get 3 shallow bowls and place flour in one, equal parts egg and water in one (mixed like scrambled eggs) and breadcrumbs in the next. Then grab a handful of risotto. (This part is messy.) Make a pocket in your risotto and place a small amount of cheese into the risotto ball. My hand is small and it makes about an ice cream scoop full. Place ball in flour and roll. Then put it in the egg wash. Then roll the ball in breadcrumbs. Place into the hot oil. Cook for about 2 minutes per side (until golden) and turn. Cook on all sides until golden brown.
For the salad I just cut a head of romaine in half and brush with vinaigrette. I grill the lettuce halves until I get char marks. Do not flip. chop the lettuce. Add whatever else you like in your salad. I put hearts of palm, tomato, cucumber, cannellini beans and red onions. Toss and add salt to taste.

Tuesday, February 21, 2012

Green Onion Blinis with Roasted Red Pepper Relish and Goat Cheese Cream

This is my entry for Ready, Set, Cook! on Food.com sponsored by Simply Potatoes.


Little bites of creamy potato pancakes with tart goat cheese and sweet red pepper relish.... yum!

Green Onion Blinis with Roasted Red Pepper Relish and Goat Cheese Cream
makes approximately 1 dozen

2/3 cup Simply Potatoes mashed potatoes
1 tablespoon all purpose flour
1 egg
1 large green onion, chopped into small pieces
1 teaspoon baking powder
1 tablespoon light sour cream
2-3 tablespoons milk

1 large red bell pepper (or used jar of roasted red bell pepper)

2 oz soft goat cheese
1/3 cup light sour cream
1/2 tablespoon lemon juice
salt, to taste

dill sprigs (for garnish)

Turn the oven to 375 degrees. Lightly oil your bell pepper on all sides. I like to cut mine in half and put them on foil lined baking sheet, cut side down. Bake until skin is blackened and loose. Allow pepper to cool and peel skin. Chop into very small pieces (like pickle relish).

Whip the soft goat cheese, sour cream and lemon juice in a smooth consistency. Add salt to taste. Set in the refrigerator.

Heat a nonstick griddle or pan to medium heat. Mix the Simply Potatoes mashed potatoes, flour, egg, baking powder, and sour cream to a smooth consistency. Add enough milk to make a pancake like batter. Mix in the green onions. (No need to salt the batter as Simply Potatoes is already seasoned unless you wish to.) Spoon one tablespoon of batter onto pan, as many as you can handle at one time. When bubbles form then pop, flip the pancake. Cook each side to golden brown.

To plate your blinis, top with a dollop of goat cheese cream and a small amount of roasted red pepper relish and a sprig of dill. Enjoy!

Friday, February 17, 2012

I (Almost) Did It Salsa! -or- The Best Burnt Salsa

There is a restaurant in San Antonio, Texas called Guajillo's. It is this amazing Oaxacan place with fabulous mole. They also have the most amazing salsa. It is lick the bowl good. I have tried to make it several time. I know it has guajillo chilies which are responsible for the vibrant orange color. It also has a good helping of lime juice and a lot of heat. 

The other day I came very close to making it completely on accident. I was going to make a salsa negra and I did not cook/burn the tomatoes long enough. When I saw that familiar orange color I added fresh ground guajillo chilies and it was really close to that salsa that I love. 


Almost Guajillo's Salsa
makes about a cup

2large slicing tomatoes
2 medium jalapenos (mine were pretty mild honestly)
3 cloves garlic (I had roasted garlic on hand so I used that)
1/4  red onion
2 tablespoon fresh ground guajillo peppers (if you don't have these peppers the salsa is still good without them)
2 tablespoons lime juice
2 tablespoons cilantro
salt, to taste
oil for coating veggies

Burn, Baby, Burn!
Turn on the broiler. Slice the tomatoes in half in which ever direction give you the most surface area. Coat the tomatoes, onions, garlic and jalapenos. Place the tomatoes cut side up. Put the vegetables in the broiler. For salsa negra you would wait until the tops of the tomato looked like charcoal. For this recipe they were about half charcoal. When they come out place everything in the food processor together. I like mine a bit more processed than most people. Add salt to taste. 

Thursday, February 16, 2012

Pizza Perfect

On our first Valentine's Day together Eric decided that we should make pizza together. This was my first time making pizza from scratch. He bought a bag of semolina flour with a recipe on the back. It took forever, but by the time we got done it was soooo good. (Plus we were slightly tipsy from the wine, which always makes pizza better.) Over the years I have tried so many ways of making pizza crust, from pizza specific yeasts, different flours, even adding veggies in them like spinach and tomato purees instead of water. This post will be just about how to make the dough. Yes, I made my sauce but you can use any sauce and any toppings once you have great crust. 

Pizza Crust Dough
makes four 12 inch crusts

2.5 cups all purpose flour plus extra
3/4 cup very warm water (Make it the temperature you like in the shower. Yeast like it too.)
2 packages rapid rise yeast (can use regular yeast but this will require that you "bloom" it first.)
2 tablespoons olive oil
1 teaspoon salt

If you have a stand mixer put the dough hook on it and preheat the oven to 425 degrees. Put the flour in the bowl. Stir in the salt and yeast. Start the mixer and add your warm water and olive oil. You may have to scrape the loose flour from the sides and knead it by hand once or twice so it will all get incorporated. You will have to add more flour slowly after you get the general mixture together. I had to add almost a whole cup this time. It will depend on how dry the flour and the air are really. Stop when you get to the point where it is not sticking to the sides or bottom of the bowl but is also not to the point of breaking apart. Turn mixer up to 2 or 4 and let knead for 10-15 minutes to develop the protein. This makes the crust more chewy than flaky. 

Then spray or coat your dough ball with oil. Cover bowl with a towel and let sit in a warm place for one and a half hours, or until it at least doubles in size. I put mine on these floor vents in the house (registers) if I am running the heat or in a sunny window if it is summer time. 

After doubling, use your hand to score the dough ball in quarters. Remove one quarter. Dust a surface with more flour, semolina or cornmeal, and roll your dough. The best way to get a circle is to just roll, turn a slight bit and roll again. Repeat until you get your circle. If it's not perfect, you can take the base of your hand and give it a little tug to stretch out small sections. Rolling takes practice. If you mess up just make it into a ball again and start over (or just eat strangely shaped pizzas). 

I know it looks like naan, but believe me it is not.
I always precook my crust because I had too many experiences with soggy centers, which will always happen if you like lots of sauce and lots of toppings unless you precook. I usually grill mine first, which involves preheating the grill and brushing the dough with oil. You can also precook in the oven. Just cook each side on the rack directly until you see large bubbles form. 

Now you can top your pizza however you like. This time I used homemade tomato-roasted garlic sauce, a mixture of grueyere, fontina and smoked gouda, mushrooms, artichoke and bells peppers (all precooked in a saute pan). 

Pizza is fun and you can do anything with it. The hardest but most rewarding part is the crust. Hopefully some of these tips help you in your pizza making adventures.


Tuesday, February 14, 2012

Happy Valentines Day!

For today I will post something a little more cutesy. I don't normally make desserts, as I have a complete inability to follow a recipe. Plus I am a little more salty than sweet kind of girl. However, I found this cute idea for making conversation heart cheesecakes on another blog, which you can see here. Her blog has beautiful pictures and tips and step by step instructions, if you are so inclined to actually follow a recipe. 

I thought about it for a while and did not want to just use food coloring. I always prefer to add color with food and flavor if possible. I started looking for raspberry cheesecake recipes that used raspberry puree to turn the cake pink. What I found instead was a green tea cheesecake, which you can see here.

Ok so that was the idea and this is what really ended up happening in my kitchen (because, again, I cannot follow a recipe).

Conversation Hearts Cheesecakes
makes 6 (or more) small heart cheesecakes

One and a half 8 ounce packages light cream cheese, at or near room temperature
3/4 cup sugar
2 eggs
1 teaspoon macha green tea powder
6 frozen strawberries
1/4 cup frozen blueberries
pink or red food coloring (for writing)

Preheat oven to 325 degrees. In a stand mixer, beat the cream cheese and sugar together until smooth. While this is happening put the frozen strawberries and blueberries in two different microwave safe bowls and defrost (or you can just get them out of the freezer and defrost them when you are bringing cream cheese to room temperature). Puree these individually in food processor. To remove skins and seeds I smash my puree through a mesh strainer with a spatula (shown in picture). Make sure to scrape puree off the back side of the strainer because most of it will still be stuck to it rather than in the bowl underneath. I then split my batter into approximate thirds with the strawberries in one, blueberries in one and green tea in one and stir. I found that the green tea one needed to be processed again to get really smooth. I used a handheld immersion blender for this. The blueberry one could have used some more processing as well.

Then put in heart molds. I had some leftover batter but not enough to fill another heart with any one color. I placed mine in a roaster with water bath as shown in Hungry Happenings blog, which worked well. They took 26 minutes in the oven for a toothpick to come out clean. I let them come to room temperature. Then I froze them for a couple hours so they would come out of the molds easily. I used a thin tipped paint brush and pink food dye to write the letters. 


They are not as vibrant or pretty as the ones made with food color, but I think I will be happier with the taste. The painting also seemed to bleed less if I painted ones that were more thawed. Also, I am sure you have noticed they do not have a crust. I did not have any type of cookies to make a crust with because I have a 3-year-old cookie monster in my house. I have not eaten them yet, except when I tasted the batter, which was good. I will let you know how they taste tomorrow.

Monday, February 13, 2012

Tour of the World Sliders

Yesterday I decided to have burgers. Veggie burgers are usually something consumed at a Chili's or some place where you have no other options without saying "Can I have the chicken salad without the chicken?" They are usually some form of commercially available black bean patty that has little flavor. I usually smother mine in mustard and jalapenos plus or minus hot sauce. 

On my way to the store I had this slightly insane idea of making a veggie patty base and making multiple different spiced patties and toppings. My mind started racing: "I could make an Indian patty by adding curry and smother it with a lovely raita and maybe lemon pickle. I could make a harissa patty.  I could make a Japanese patty with wasabi..." You get the picture. This is what I ultimately decided on: Mexican, German, and Thai sliders.

Tour of the World Sliders
serves 2

The Base:
1/2 of a 14 oz block of firm tofu
1/2 cup of TVP ( if you don't have TVP other sources of a liquid absorbing agent could be used like breadcrumbs)
1 egg
1/2 cube of veggie bullion (mostly just used for salt so you could use some soy sauce)

This is not a meat tenderizer. It is a garlic smasher.
The spices:
2 tsp of Thai green curry paste
2 tsp guajillo chili powder
1 clove garlic
1/2 tsp ground cumin
salt and pepper

small amount of oil for cooking

Not the prettiest pic but just to illustrate the pasty consistency.
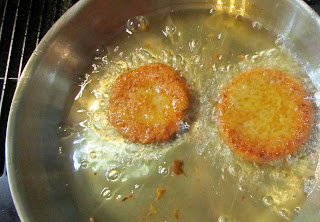
Press the tofu for a few minutes to extract some of the water.* Pulse the base in food processor until it all comes together. Allow to sit for 30 min so the egg can soak into TVP. Split the base into three bowls. Add curry paste to one. Add chili powder, cumin, garlic and salt to one. And just salt the last one.  When ready to cook place a small amount of oil in a frying pan and heat to med high. I formed my patties by smashing them in a ring form but you can form them by hand. Place in oil and cook on each side for two minutes until nicely browned.

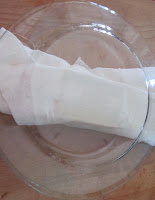
*I always press tofu by wrapping in a paper towel and placing between two plates. Then place a heavy book on top. I even have a special cookbook that I never cook from but keep just for this purpose.

The toppers:

Asian cucumber salad
1/2 cucumber, peeled and seeded and sliced very thin
1 tablespoon light soy sauce
1 tablespoon rice venegar
2 cloves of garlic minced

Just stir together and let sit in the fridge while preparing other parts.

Pico de Gallo
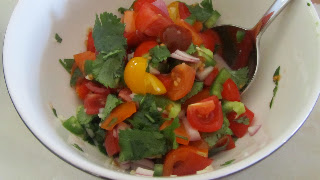
6 assorted cherry tomatoes (or one medium tomato), chopped
1/4 red onion, chopped
2 cloves garlic, minced
1 medium jalapeno, finely chopped
2 tablespoons of cilantro
1 tablespoon lime juice
salt

Again just mix together and refrigerate.
Fried onions 
1/4 cup of all purpose flower
1 1/2 teaspoon of baking powder
1/2 cup beer (preferably stolen from your husband's hands while he is drinking it)
salt (about 1/2 teaspoon)
1/2 purple onion cut into strips
oil for frying

Heat oil in pan to medium high heat. (I did this before I cooked the patties so I could use the same oil and the same pan. This resulted in my patties being cooked in far more oil than necessary, but it was delicious.) Mix the batter together. It will be quite foamy at first. Just keep mixing. Add onion strips. Stir to coat them. Place them in the hot oil and fry til golden brown. Don't crowd the pan or they will all stick together. I did mine in a couple batches. Remove them from oil with slotted spoon and place on plate with paper towel. I then placed mine in a warm oven (around 200 degrees) to keep warm while cooking sliders

Also needed for topping:
smoked gouda
pepper jack
German mustard
sliced dill pickles
sriracha

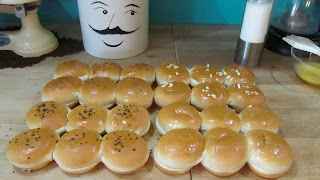
To make my bread a little more fancy, as they were just store bought slider buns (Gasp! I know. I should have made my own buns.), I brushed them with egg wash and put some of my left over minced garlic on some for the Mexican ones, fennel seeds and salt on top of the German ones and black sesame seeds on top of the Thai ones. I popped them in the warm oven while I was cooking. 
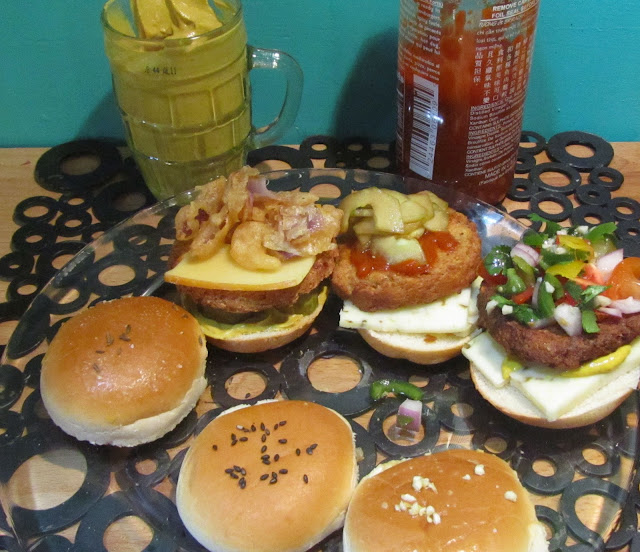
Assembly time: 

Thai patty+sriracha+cucumber salad+pepper jack
Regular patty+smoked gouda+mustard+onions+pickles
Mexican patty+pico+pepper jack 

I also put some regular mustard on the Mexican one too. Don't judge me. I'm from Texas. It's south of the Mayonnaise/Mustard Line.**
I know this all seems quite complicated but it only took me about an hour. It is all in time management. Get your base made first so it can rest for 30 minutes. Then do your salad toppers so they can hang out in the fridge. Heat your oil. Get your onions done and popped in the oven. Put your bread in the oven at the same time to warm up. Then it's time to make your patties. 

I could have been a sane person and made only one type, but it was a Sunday. I like to do cooking projects on the weekend.  Also, it was delicious. If I was doing this on a weeknight, I would have only made one. Also, this is the first time I have made this particular veggie patty base recipe. I've tried a lot, and they are always too soft. This was perfect consistency, like a Morningstar Farms patty. Sorry, I have to brag. I ad libbed this completely, and it was better than any recipe I have followed. I think I will make a bunch and freeze them rather than buying anymore frozen ones. Well, I will still buy Quorn patties because they are awesome, and I don't have access to weird mycoprotein stuff.

I will definitely do this again when I can't decide which delicious type of ethnic food to eat. Maybe I can get some little toothpick flags to hold them together. That would be too cute for a party food. Of note, Eric did the same thing with regular hamburger meat, and his advice was to mark which is which because he lost track for a moment. However, with the veggie ones it is easier to tell based on color. 

Despite the lengthy post, do not be intimidated. I just went a little mad scientist in the kitchen (insert insane laughter here), but these burgers are totally easy, especially if you do just one type. The base is versatile, delicious and packed with protein. So mix up the flavors and have fun.

**As mentioned in the caption above, the Mayonnaise/Mustard Line is the line that divides the North and South. It transects Huntington, West Virginia. Above this line is the North and the farther you go up north the more they just love mayonnaise. For instance, in Canada they put it on their french fries. Below this line is the mustard lovers. As an illustration of this, McDonald's offers the Texas Homestyle burger which is not covered in chili or barbeque sauce as you might imagine but is smothered in mustard. (This is a totally made up concept by me, but it's true and may have been yet another reason for the Civil War.)


Sunday, February 12, 2012

Romantic Risotto

Ok so I didn't make this today but I thought I would post it if someone needs a yummy recipe for Valentine's Day. Though we will be having our traditional homemade pizza for Valentine's, which will appear here in the future, this is what I would probably make if we didn't have a pizza tradition (which was started by my husband on our first Valentine's together and was my first time making pizza from scratch). 

I have tried so many risotto recipes and this is what I have come up with and I love it. 

Spinach and Mushroom Risotto
(Serves 2)

1/2-1 medium white onion
1 tbsp olive oil
1 cup arborio rice
1 cup dry white wine (or dry vermouth)
4 cups vegetable stock
2 cups mushrooms (crimini, oyster, and other wild mushrooms are best)
2 cups fresh baby spinach
1/2 cup grated parmesan cheese
truffle oil (optional)

Cook the mushrooms first. Chop them to desired size. Saute or grill them in a little oil until they are soft and set aside.

Heat stock in the kettle. Heat olive oil over medium low. Chop onion to approximately the same size as rice. Saute the onion until translucent and soft. Add the rice. Make sure it gets coated with oil. You may need to add more. Stir the dry rice and saute for about a minute. Now add the cup of wine. When the wine has disappeared, add the vegetable stock in small increments, about half a cup. Keep adding the stock and stirring until the rice is a little al dente. You don’t have to stir the whole time but this helps to release the protein from the rice. You want your rice to be creamy but not sticky. Stir in the spinach little at a time to wilt. Finish it off by stirring in the cheese and mushrooms. Plate with a little truffle oil on top.

*This is a basic risotto recipe and can be altered by adding any number of vegetables and cheeses. Try asparagus and peas with a little lemon zest for a spring time version. 

Saturday, February 11, 2012

Mac and Cheese with Hidden Orange Bell Peppers

I was trying to nap today when suddenly I hear yelling from my 3-year-old son's room. "Mommy! Mommy! Mommy!" ... and so on. "Whats wrong?" "I need mac and cheese!" As you can see, this was extremely urgent. We go upstairs only to discover that our stock of mac and cheese has been devoured. Thus I had to whip some up in a hurry. I decided to add some hidden veggies in it. I have never done this before but it seemed like a good idea.

Mac and Cheese with Hidden Orange Bell Peppers
serves 2 (or one very hungry 3 year old)

1 cup dried elbow pasta
6 small sweet orange bell peppers
4 wedges of Laughing Cow light cheese
4 oz sharp yellow cheddar
1 teaspoon of cornstarch
1/2 cup milk
1 teaspoon dijon mustard
salt and pepper to taste

Bring pot of water to boil. Always make sure to use a lot of water in your pasta so it does not clump and become horrible. In the mean time, remove stems and seeds from peppers. Place them in a microwave safe dish. Place 1/2 inch of water at the bottom. Loosely cover the container and steam in the microwave for 6 minutes. This is a fast way of steaming. You can alternately boil the peppers. When they are done your water with probably be boiling and you can add your pasta. My pasta took 8 minutes to cook al dente. Then puree peppers in food processor until silky smooth. I thought this might require some extra water but it didn't. 

When pasta is done drain and rinse with cold water. Rinsing pasta removes the starch and keeps the noodles from sticking to each other. 
Using the same pan add corn starch and milk. Whisk and bring to a low boil. I added my puree and laughing cow cheese at this point and whisked until smooth. Then add cheddar and more whisking.
Put the pasta in the pan and bring to desired heat. At the last minute I added the dash of dijon mustard to give it a bit more sharpness.

Season with salt and pepper to taste.

Ta Da!
As you can imagine by the time I got done with this (It only took about 20 minutes) my 3-year-old was not all that interested. However, I think I would make this again for myself. There was too much sauce but that could be fixed by adding less puree next time... or you can just be happy with your extra cheese and pepper sauce. I would also add steamed broccoli next time as I usually like chunks of broccoli in my mac and cheese.

Hot and Sour Soup with Black Garlic

So here you are, starting with me on my journey of blogging food. Today I decided to make my version of hot and sour soup with things that I had on hand. I've made many versions of hot and sour soup, some successful, some just ok. Just to give you fair warning I didn't have several things I would normally like to use, including wood ear mushrooms, lemongrass or silken tofu. I did have something that I don't normally have, or I should say I've never used: black garlic.

I ran across black garlic on Gilt Taste a while back and wanted to try it so bad but couldn't make myself purchase $35 worth of an unknown ingredient. I went to visit family in San Antonio last week, I stopped by my all time favorite grocery store, Central Market. I wasn't looking for anything in particular, but as always I found a bunch of stuff that I suddenly needed. If garlic and tamarind had a baby this is what it would taste like.  Regular garlic would work too but this added an interesting touch. If you do use regular garlic, you should saute it with some oil for about 30 seconds as your first step. This was not necessary as black garlic is quite mild and soft already.


 The can is straw mushrooms, which is available at most Asian markets or if you are unfortunate like me and don't live near an Asian market you can get them on Amazon.com. The box is the best vegetarian bullion, Edward and Sons Not-Beef bullion. I also got this on Amazon but it is available at my local Kroger as is the Not-Chicken. It has palm oil in it and has a very rich flavor. Also the Not-Beef tastes more mushroom-y. The green top jar is Hoy Fong Chili Garlic sauce which I prefer to their sambal oelek because it has garlic (obviously). Oh and just a plug for my favorite lime juice (when it's off season and I can't get good limes in West Virginia), the Santa Cruz Organic brand is the only one that I think actually tastes like limes and not just citric acid in water. The only thing not pictured that I used was some cherry tomatoes that I threw in at the last minute. Oh you've never had hot and sour soup with cherry tomatoes? Try it!

Now for the recipe:

Hot and Sour Soup with Black Garlic
serves 2

Soups On!
1/4 head of sliced cabbage
2 cloves of black garlic
2 green onions, chopped in 1 inch segments
6 cherry tomatoes cut in quarters
1/2 can straw mushrooms, sliced in half lengthwise
1 tablespoon dark soy sauce
1 Not-Beef bullion cube
4 cups of water
2 tablespoons of garlic chili sauce
2 tablespoons lime juice
1 tablespoon rice vinegar

Here's how easy it was. Put everything in a pot except for the onion and tomato. Boil until cabbage is tender. Add the onions and tomato and cook for about another two minutes. 

The response from my husband was promising. "I don't like hot and sour soup and I like this." I also liked it but in the future I would add firm silken tofu in small cubes. Lemongrass would have been nice. I don't particularly like egg in my hot and sour soup but if you do then just crack and egg, stir it up like you are making scrambled eggs and just stir it into the soup as a last step.